Every speaker, microphone, headphone, and hearing aid that leaves a production line must meet precise acoustic specifications. This guide walks you through the transition from manual electroacoustic testing to a fully automated audio test system.
Why Automate? Manual Testing vs. Automated Testing
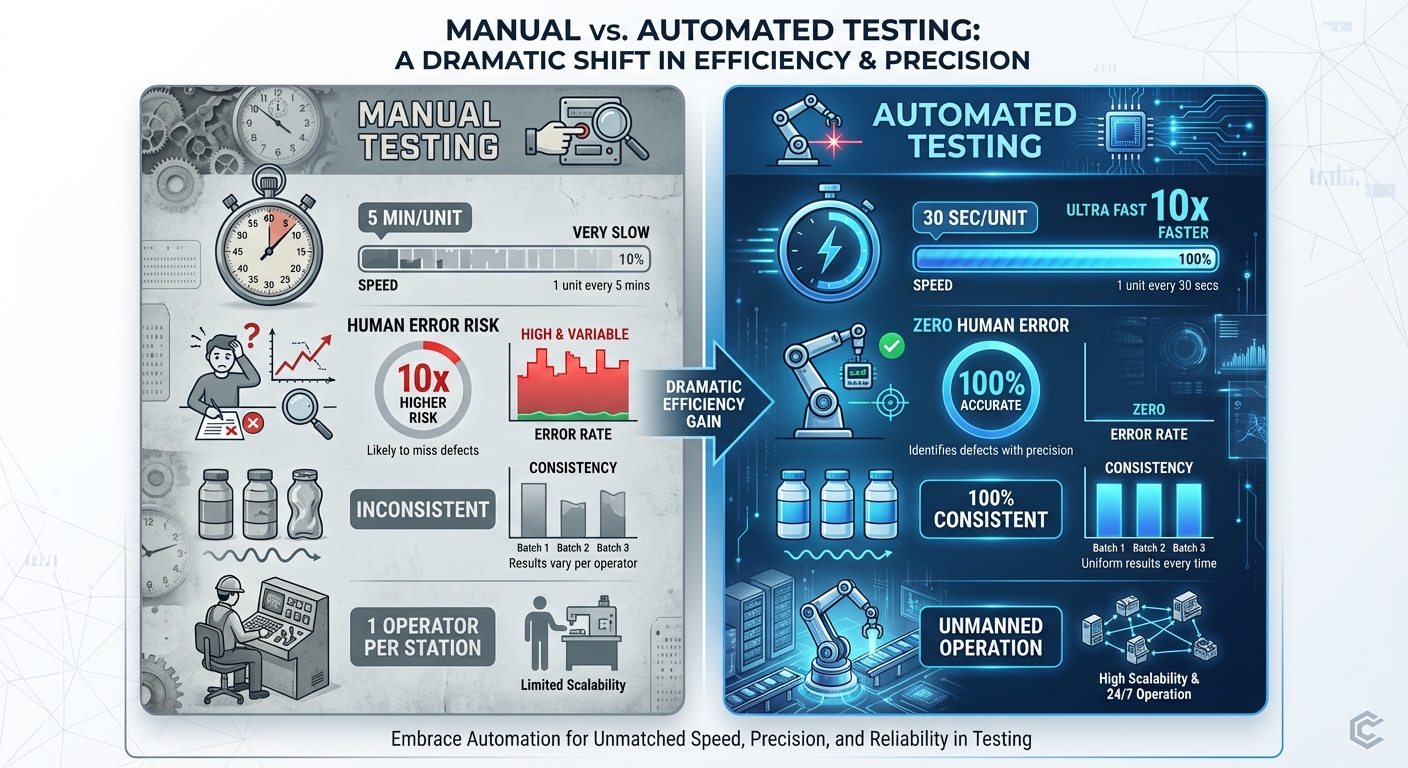
The Manual Approach
A typical manual setup consists of a signal generator, power amplifier, measurement microphone, audio analyzer, and an operator who connects the DUT, triggers each measurement, reads results, and records pass/fail.
Limitations: Slow (2–5 min/unit), operator-dependent, error-prone, difficult to scale.
The Automated Approach
| Factor | Manual | Automated |
|---|---|---|
| Test time per unit | 2–5 minutes | 5–15 seconds |
| Throughput | 15–25 units/hour | 200–500+ units/hour |
| Repeatability | Operator-dependent | < 0.5 dB variation |
| Data logging | Manual/partial | Automatic, 100% traceability |
| Defect detection | Subjective | Algorithmic, consistent |
ROI is typically realized within 6–12 months for mid-volume production (>500 units/day).
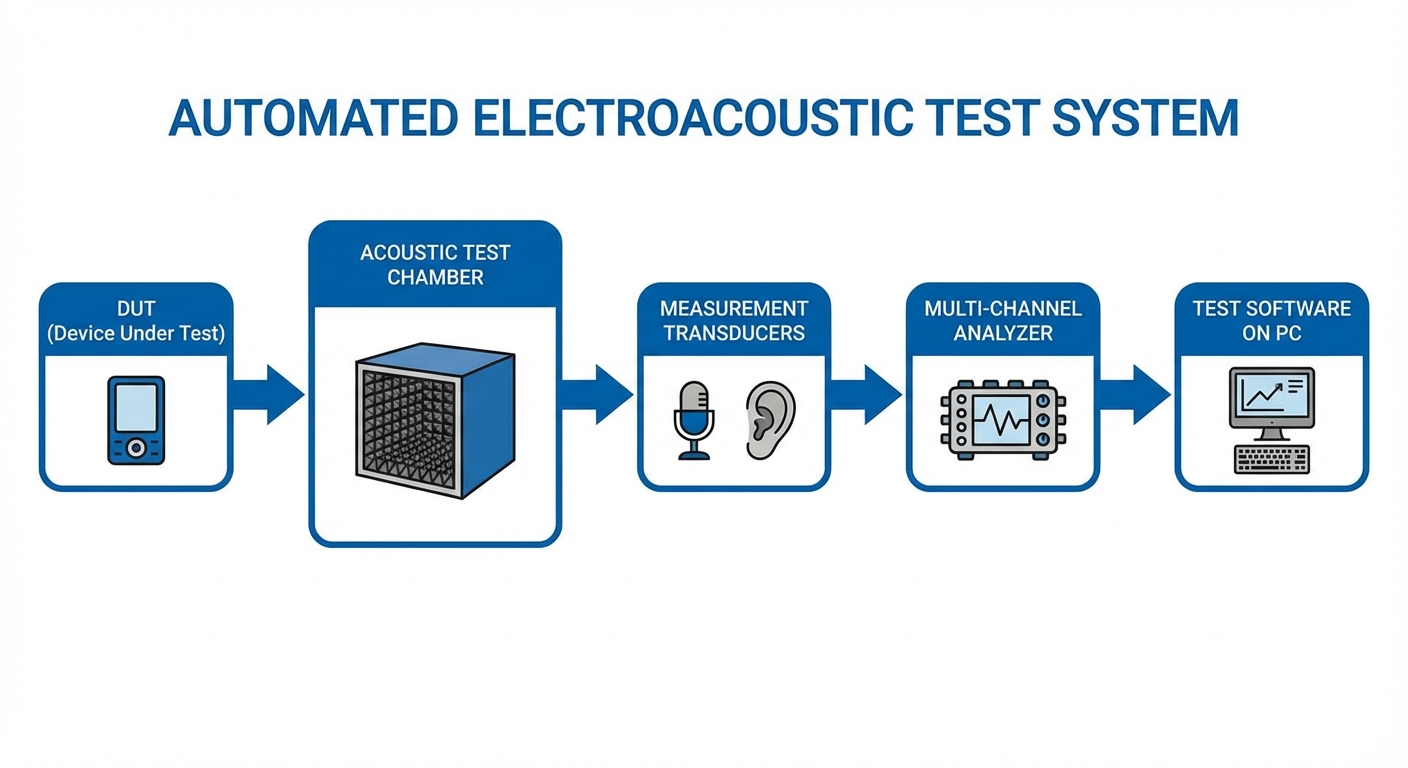
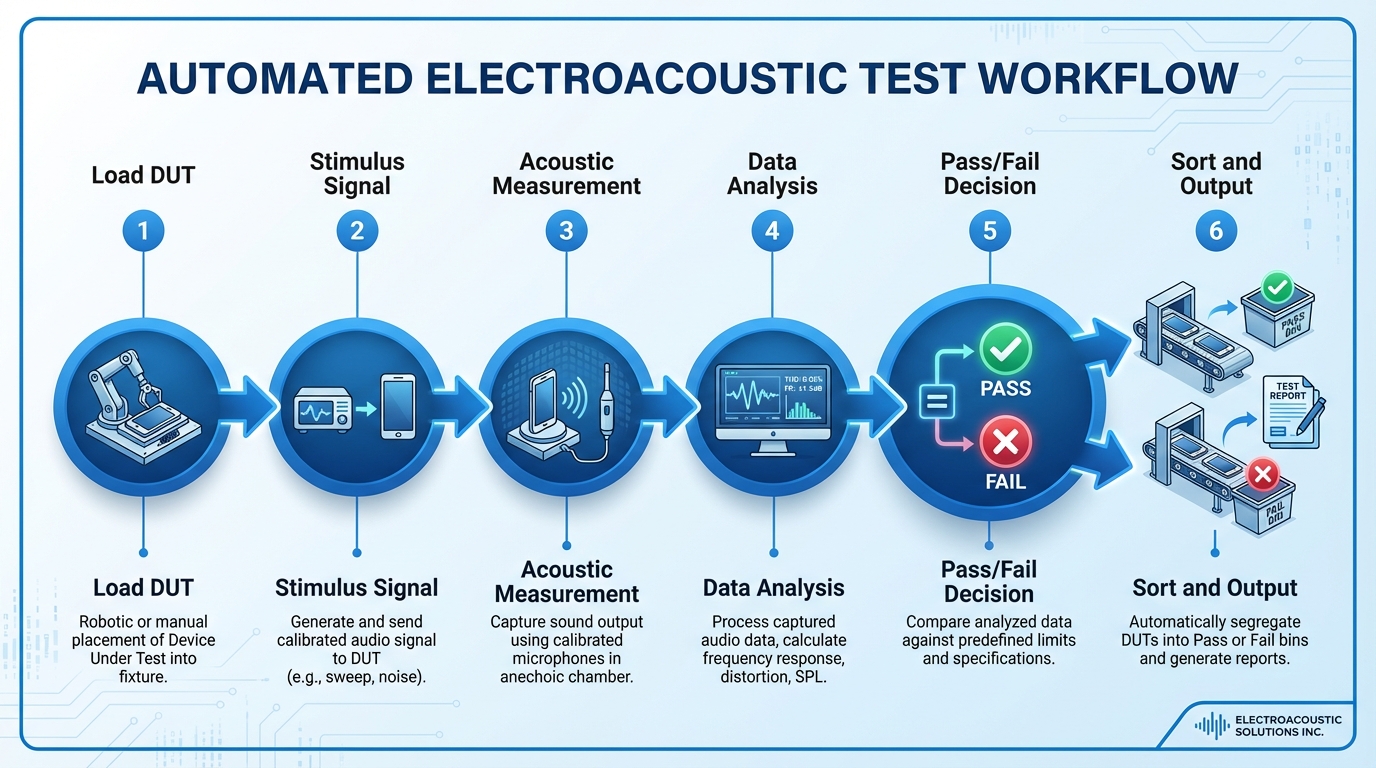
System Architecture: Hardware and Software
1. Signal Generation and Acquisition (Audio Analyzer)
Modern audio analyzers integrate signal generation and acquisition in a single instrument with USB or Ethernet connectivity.
2. Acoustic Test Chamber (Test Fixture)
The DUT must be tested in a controlled acoustic environment—anechoic coupler, semi-anechoic test chamber, or IEC 60318-compliant ear simulator.
3. Switching and Connectivity
Relay matrix, barcode/QR scanner, PLC or I/O controller for conveyor systems and MES integration.
4. Test Software
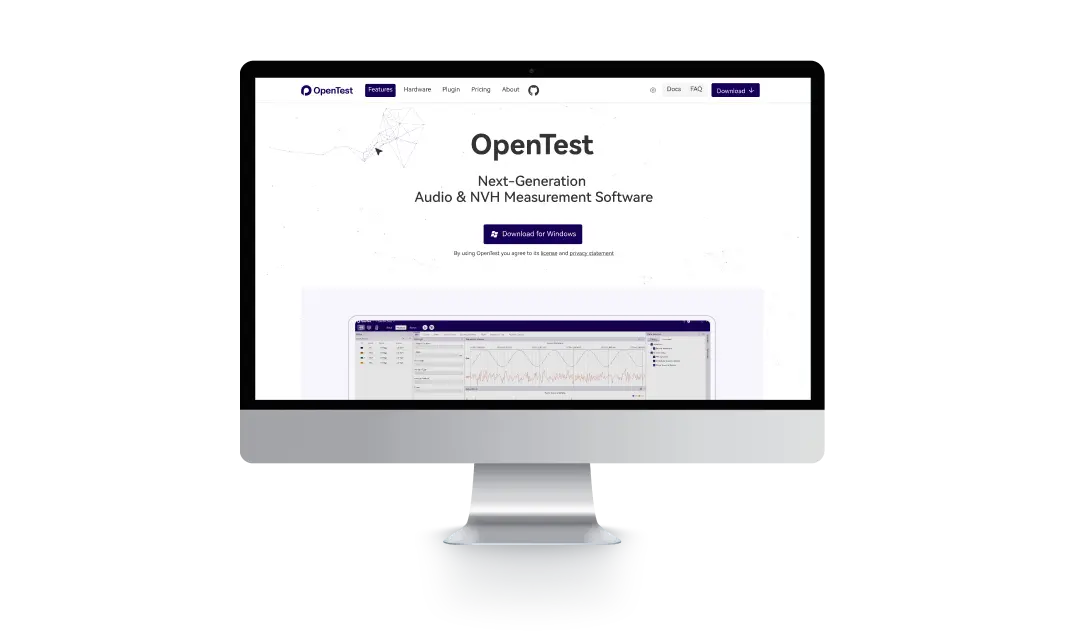
CRYSOUND’s OpenTest platform provides a drag-and-drop test sequence editor, multi-station deployment, and built-in SPC dashboards.
Key Electroacoustic Test Parameters
- Frequency Response: SPL vs. frequency curve evaluated against upper and lower limit masks
- Total Harmonic Distortion (THD): < 1% at 1 kHz rated power typical spec
- Rub and Buzz (R&B): Detects mechanical defects—loose particles, voice coil rub, rattling
- Impedance: Reveals resonant frequency, DC resistance, electrical behavior
- Polarity: Verifies correct phase direction
- Sensitivity: SPL at reference distance for given input
- Seal and Leak Test: For enclosed products
Step-by-Step: Building Your Automated Test Line
- Define Test Requirements — List every parameter, pass/fail limits, cycle time, and applicable standards.
- Design the Test Station Layout — Calculate station count, inline vs. offline, one-sided vs. multi-sided.
- Select and Procure Equipment — Audio analyzer, microphones, test chamber, switching hardware, software.
- Build and Integrate — Assemble fixtures, wire signal paths, install software, connect PLC/MES.
- Establish Golden Unit Calibration — Select 5–10 reference units, define reference curves and repeatability baseline.
- Validate and Fine-Tune Limits — Run pilot batch of 100–500 units, analyze yield, adjust thresholds.
- Train Operators and Launch — Document procedures, go live with full data logging.
- Continuous Improvement — Daily calibration verification, SPC monitoring, periodic microphone recalibration.
Common Pitfalls and How to Avoid Them
- Inadequate Acoustic Isolation: Design chamber for ≥30 dB insertion loss.
- Over-Tight Limits at Launch: Use pilot-batch statistics (mean ± 3σ).
- Ignoring Fixture Repeatability: Use positive-location fixtures, verify with gauge R&R.
- No Reference Unit Tracking: Measure reference unit at start of each shift.
Conclusion
Transitioning from manual to automated electroacoustic testing pays for itself through higher throughput, better repeatability, and comprehensive data traceability. The acoustic quality your customers hear is only as good as the test system that verified it.
Ready to automate your electroacoustic test line? Contact CRYSOUND to discuss your production testing requirements. From audio analyzers and measurement microphones to the OpenTest software platform, CRYSOUND provides end-to-end solutions for production line audio testing.
IA3104 Contact Ultrasound Sensor
CRY3408-S01 Pressure-field Prepolarized High-level Microphone Set, 1/4", 0.14mV/Pa
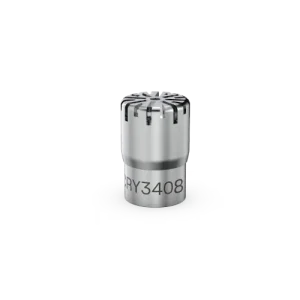
CRY3408 Pressure-field Microphone, 1/4",Prepolarized high-level,0.14 mV/Pa

CRY578 Bluetooth LE Audio Interface